“Camera 7” Documentation by “UpCode” v1.0
“Camera 7”
Created: 7 Dec 2013
By: UpCode
Dear customer, First of all, thank you for choosing our themes and purchasing one of our Premium Themes – your choice is greatly appreciated! Current version of Camera 7 has been developed for WordPress 3.6 and above and is not backwards compatible with older versions of WordPress. Camera 7 has been tested in all modern browsers: IE 9, Opera, Firefox, Safari and Chrome. Camera 7 is a very simple and useful Premium Theme, especially for people who need a really cool looking website / blog. If you have any questions that are beyond the scope of this help file, please feel free to email via my user page contact form here. Thanks!
Table of Contents
- Installation
- CSS Files and Structure
- JavaScript
- Theme Options
- Setting up frontpage
- How to create posts and assign images
- Set up Contact page
- Select categories to show galleries from
- Set up a gallery as homepage
- Menus
- Page layouts
- Sidebars
- Post formats
- Support
- Sources and Credits
A) Installation - top
To install this theme you must have an operating version of WordPress already installed. For information regarding WordPress installation, please visit - http://codex.wordpress.org/Installing_WordPress
Extract the zipped package downloaded from ThemeForest to your desktop, in it you will find Camera 7.zip file which is the wordpress theme.
You can install the theme in two ways:
- FTP UPLOAD Install: Extract Camera 7.zip file and upload the extracted folder to /wp-content/themes/ folder on your server.
- WORDPRESS Install: Navigate to Appearance -> Add New Themes -> Upload page. Select Camera 7.zip file. Press the Install Now button to upload and install the theme.
B) CSS Files and Structure - top
I'm using more CSS files in this theme. The main CSS file is in the css/autoinclude/style.css folder. All the main styles are stored here.
This theme is based on Foundation Framework by ZURB. If you need any more information about it - check the internet about how it works.
The widget are styled through the autoinclude/css/upcode-widgets.css file. If you need to change something about the way your widgets look, check this file.
This theme respects the latest HTML markup with a header, content and footer element.
			header#header
			--
			section#main
			--
			footer#colophon
Your view type code is located in the lib/php/post.class.php file. Check for vertical_view() and horizontal_view() functions. If you're not familliar with PHP, please don't try to change anything there.
C) JavaScript - top
This theme imports more Javascript files.
- jQuery
- My custom scripts
- Superfish jQuery Plugin
- Supersubs jQuery Plugin
- prettyPhoto jQuery Plugin
- jQuery is a Javascript library that greatly reduces the amount of code that you must write.
- Most of the animation in this site is carried out from the customs scripts. All website frontend actions that are related to JavaScript are located in the js/functions.js file.
D) Theme options - top
This is a simple and easy to use, yet a very powerful theme. Here are some ideas of how everything works.
The theme has a options button located at the bottom of the wordpress menu, named Camera 7.
There, we have the following:
- General
- Layout
- Styling
- Likes
- Menus
- Post settings
- Social networks
- Stats&Booking
- Typography
- Sidebars
- Custom CSS
- Export
In General you’ll find options to hide the default wordpress bar, a place to insert your tracking code, change your copyright text or change the copyright. Also, you can disable the hardcoded SEO, enable/disable sticky menu, header stats (features), social icons, the searchbar, or the bottom book (contact) links.
Then we have the Layout tab. This serves to set up defaults for your sidebars. This tab has listed all pages that can be changed (to add or remove sidebars).
Next, you have the Styling tab. This tab is for changing the default favicon and the logo type. Here you can upload a custom image logo as well. Here, you can set the default text and background color for your posts. You can set the colors for your articles on your website and enable/disable the stripes (dotted) effect.
The Likes tab reffers to the like system used by default in our theme. You can enable/disable them set a label for it or change the icon.
In Post settings, you can find all settings for your posts. Add/remove similar posts, show/hide image in posts, etc.
In Stats&Bookings you have 4 blocks for each Bookings and Stats. Here you can write your stats/features. If activated in general settings they will appear on the top of your page. (A clickable icon which will show them). You can change the texts. This will also change the subjects used in the contact form that appears bellow.
The Typography tab is for changing the fonts used in this theme. You can change the general theme font used for general fonts, the font used for the menu and the font used for headings.
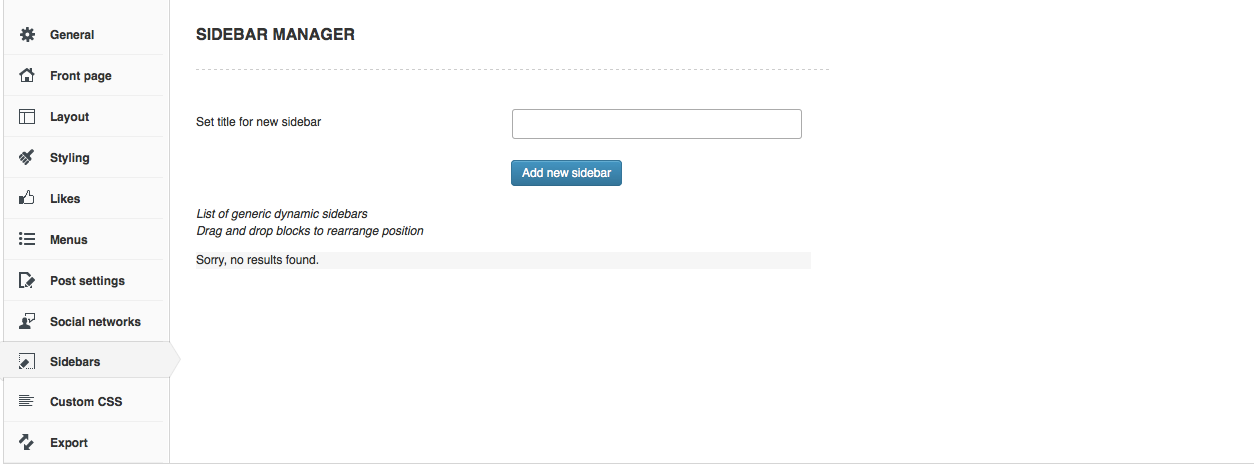
The social networks tab is used to add your accounts on different social networks. These will be used on the social icons located in header and for the social icons widget. If you need new sidebars, go to the Sidebars tab. There you can create as many as you want and then set them to any layout you need.
If you need custom CSS, the Custom css tab has a input that will help you add some new styles if needed.
The Export tab is used if you need to import/export all settings from your current website. Don’t touch this as it could erase all data. Be very carefull with this.
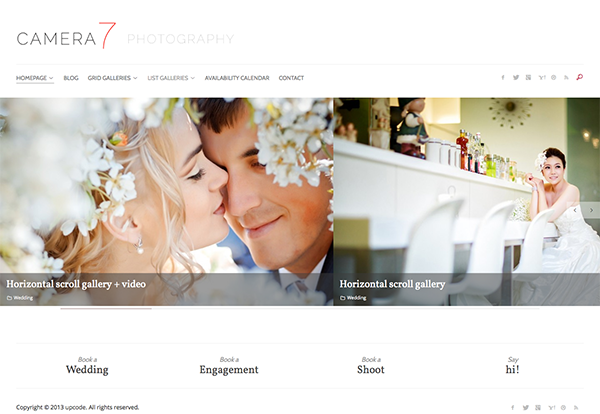
E) Setting up frontpage - top
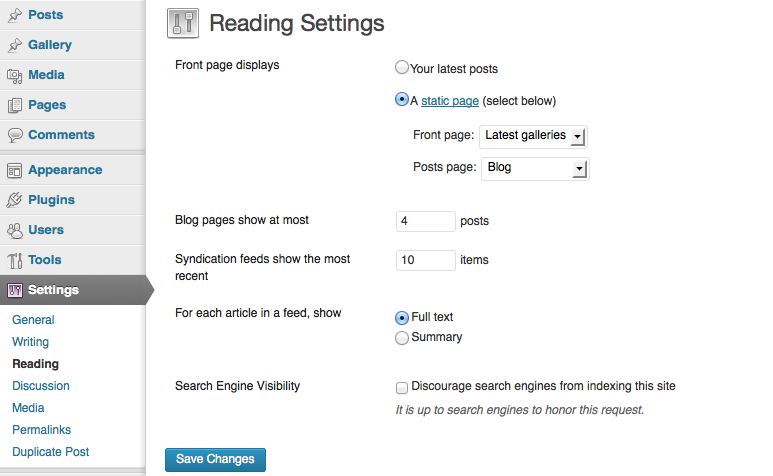
On first install, you will get the blog page only. If you need to set galleries listing for your homepage - create a page and assign the template you want to it. Find out details here
Then set it up in Settings -> Reading as your frontpage like this:
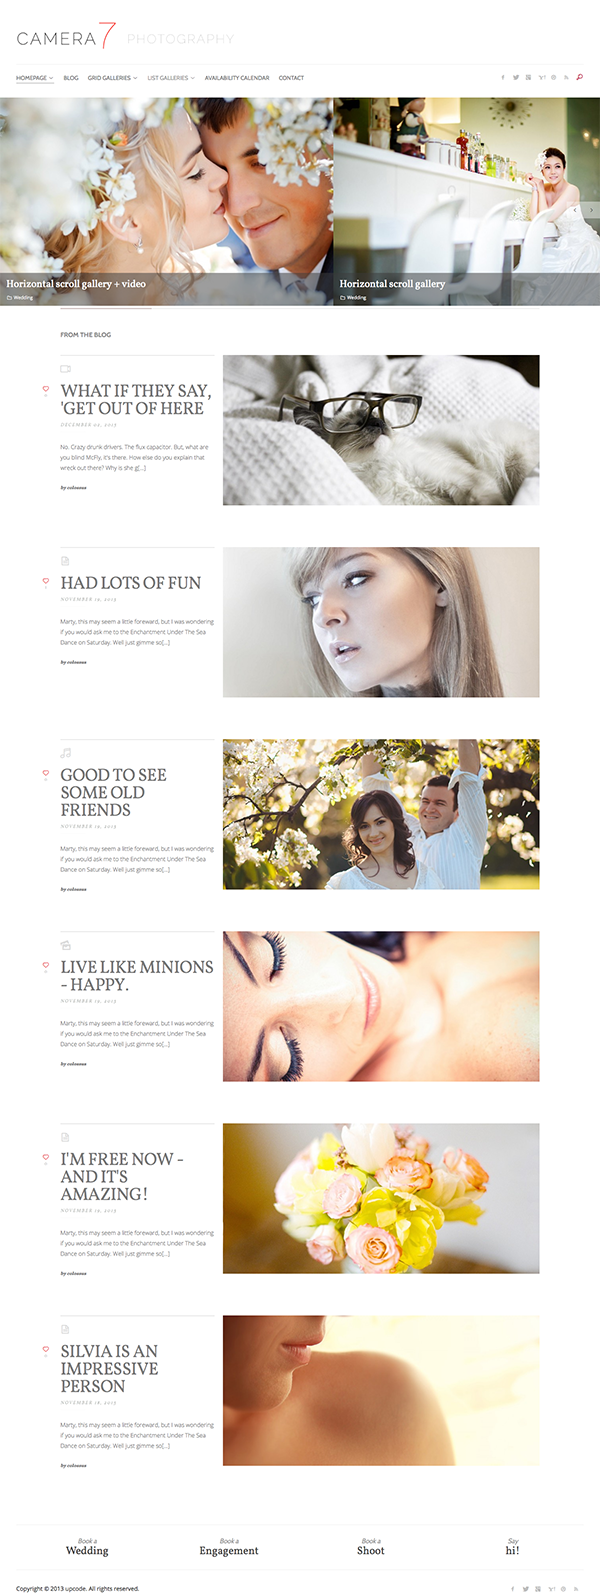
E) How to create gallery posts - top
The image shown in frontend is the featured image. Please add featured images to all your galleries for them to work as expected.
Gallery are created the usual WordPress way. Go to the Gallery tab, and add a new posts. There is a "Gallery" custom post type. On the Add new post page, you’ll find the special Camera 7 Theme Post settings that looks like this:
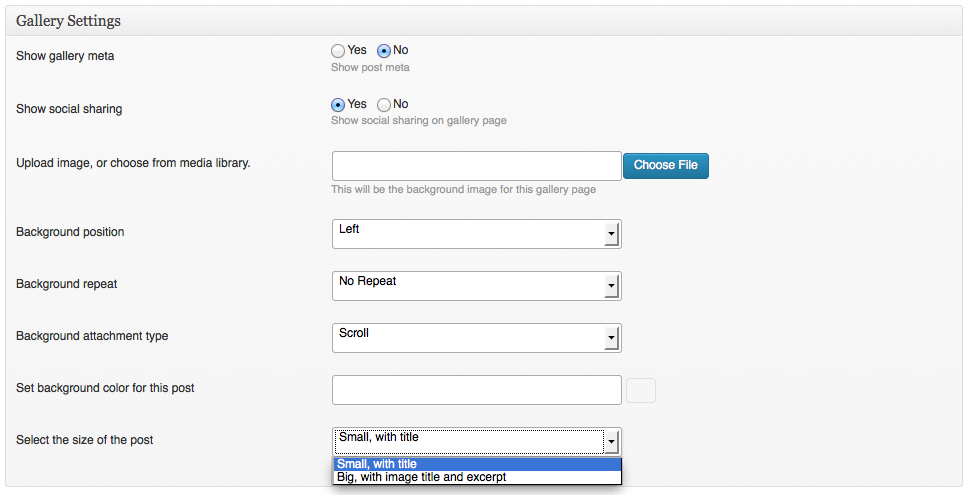
This settings are related to each post you add. So, the Show related posts option gives you the opportunity to show/hide the related posts in this exact posts (on your blog post page for user view).
This is exactly the same with Post meta, Post love and Social sharing. You can enable/disable them for each post. You also have the option to show or hide the featured image on your archive pages. This includes frontpage as well.
You can add featured image to the post to be shown only inside your article page, but hide it on the archive pages.
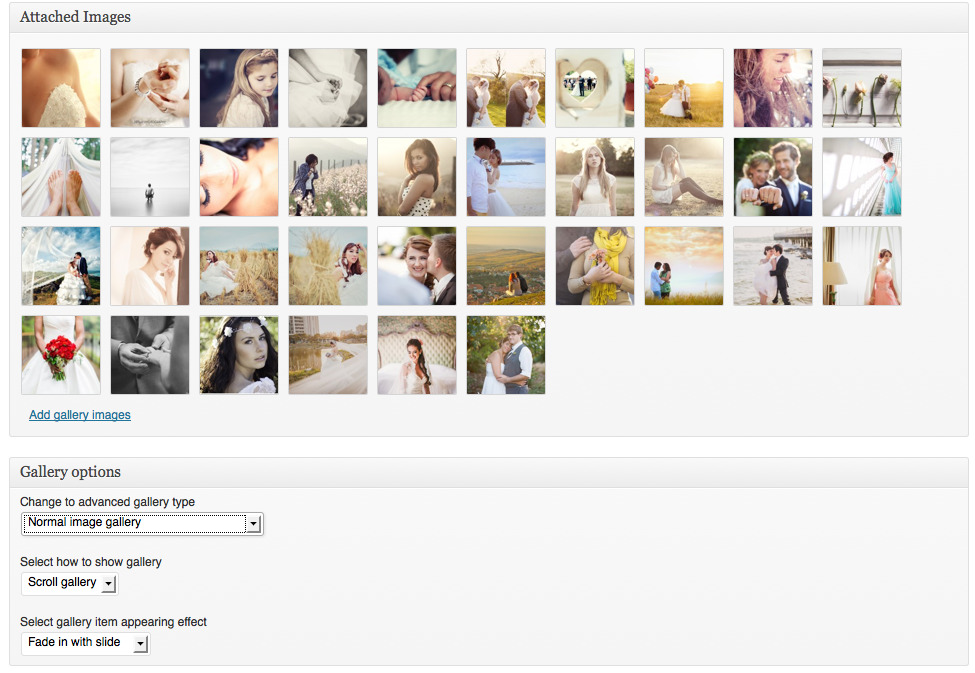
This theme includes powerful galleries. First of all, these are divided in 2:
- Normal gallery
- Advanced gallery
A normal gallery consists only from images. You cannot add videos in it. As long as you don't need to showcase videos - you'll be ok with it.
A normal gallery has it's own options:
How to show the gallery, and the effect you want to use for it.
Like you see, a normal gallery type can be shown in 3 different ways:
- Grid
- List
- Horizontal scroll
Also, for grid and list galleries you can apply special appereance effects (when you scroll on the page, the images are animated). Horizontally scrolled do not have this feature!
For grid and list galleries you have the following effects:
- Fade in
- Slide up
- Pop in
- 3d slide in
- Rotate with slide in
- Rotate in
- Card flip
- Fade in with slide
An advanced gallery consists from images and videos. But you have to add each of them manually.
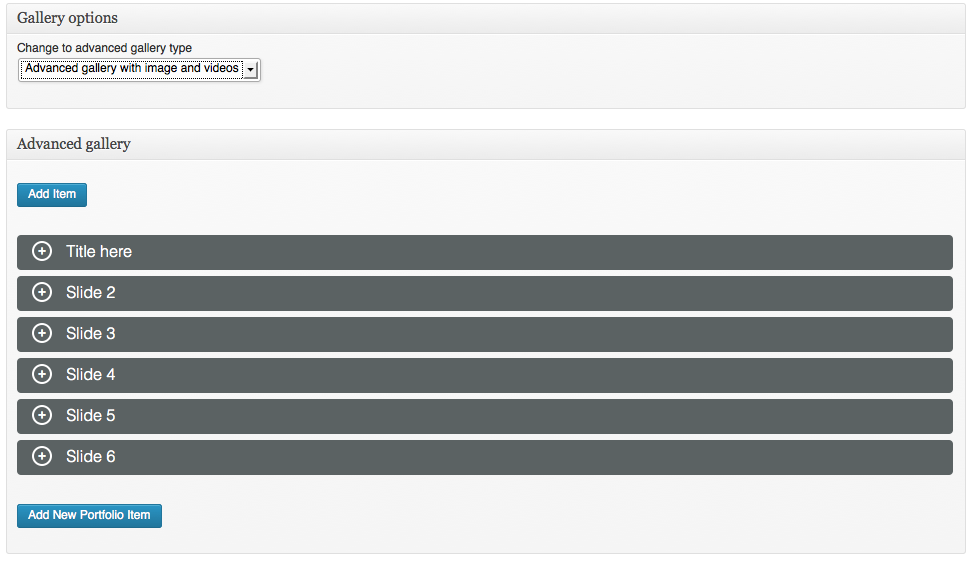
You can sort them as you want. When adding a new item you have to choose wether you want to add a video or an image. If you select image, you'll have to choose one from your media or upload a new one.
If you want video item, choose video and insert the address of your video / embed code in the box. This feature works best with vimeo or youtube videos.
E) Set up contact page - top
To create a contact page like on the demo, please add a new page and select the Contact page template from Page attributes for it like shown below:
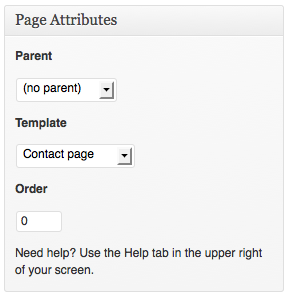
Any content added in the editor will be shown below the contact form if Contact page template is selected.
E) Select categories to show galleries from - top
To select the source of the galleries, check the page and find this box:
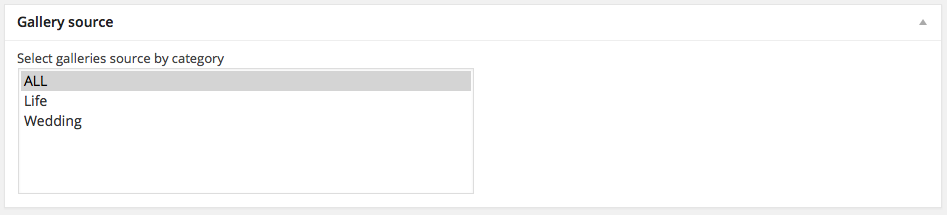
It is a multiple select, so you can select multiple categories. Just hold CTRL for PC or Command for Macs and press on the gallery category you need.
E) Set up a gallery as homepage - top
To create a homepage from a gallery you should create a new page (or use an existing one), go to the page attributes and select the "Single gallery page" like shown here:

After you select the template you should get a new box on your page, named Gallery source, with a select in it. There you have a list of your created galleries. Select the one you want to show on this page and then update the post. That is all, nice and easy.

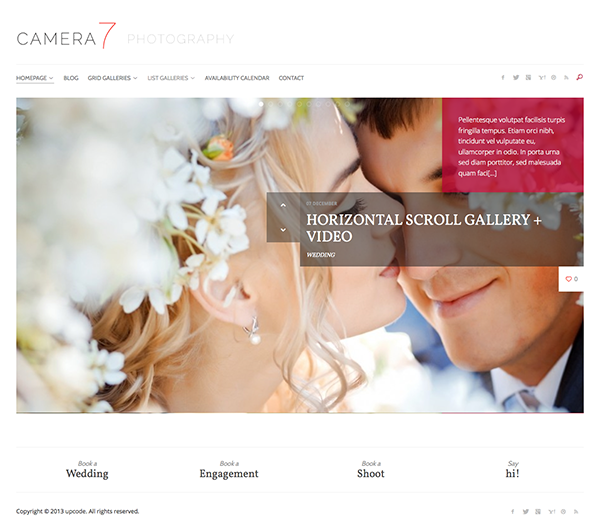
E) Set up gallery page - top
To create a gallery page like on the demo, please add a new page and select the the template you want from Page attributes for it like shown below:
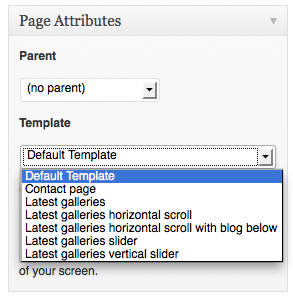
You have 5 different templates for showcasing your galleries
- Gallery slider template
- Grid galleries
- Horizontal scroll + blog template
- Horizontal scroll template
- Vertical slider template
The Gallery slider template looks like this:

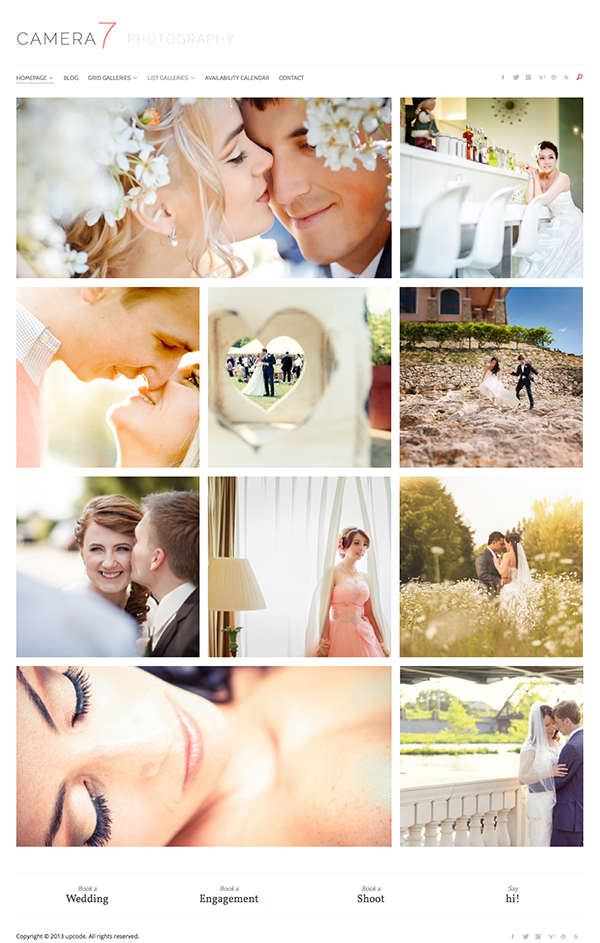
The Grid galleries template looks like this:
The horizontal scroll + blog template looks like this:
The horizontal scroll template looks like this:
The vertical slider template looks like this:
E) Menus - top
We recommend you to create your own custom menu. To do so, go to Appearance – Menus and create a new menu. E.g.: Menu 1. Then, from Manage Locations choose for Main menu the newly menu you have just created.

Populate the menu as desired by dragging and dropping custom links, pages or categories. Press Save Menu. You can set the number of visible page items in the main menu. To do so, navigate to Camera 7 -> Menus
Remaining pages will be visible from the dropdown menu item “More”.
E) Page layouts - top
By default, the layout is set in 2 columns aligned by right side. You can now choose the page template aligning the content by left side or opting for full-‐width display (no sidebars).
This option is available both for posts and pages.

E) Sidebars - top
If you choose the Sidebar Layout for your post, you can display different sidebars at your desire. Select which Widget Area will be shown for each particular post from the select bar below the Post Layout. By default, the Main Area will be shown.
You can add individual sidebars for specific posts. Create your New Sidebar then go to Appearance – Widgets and populate your Areas with desired Widgets.
E) Post formats - top
Choose the corresponding format of the Post to correctly add a video, audio, gallery or standard post.
If Gallery post format is selected, a box with the gallery options will appear. It will look like this:
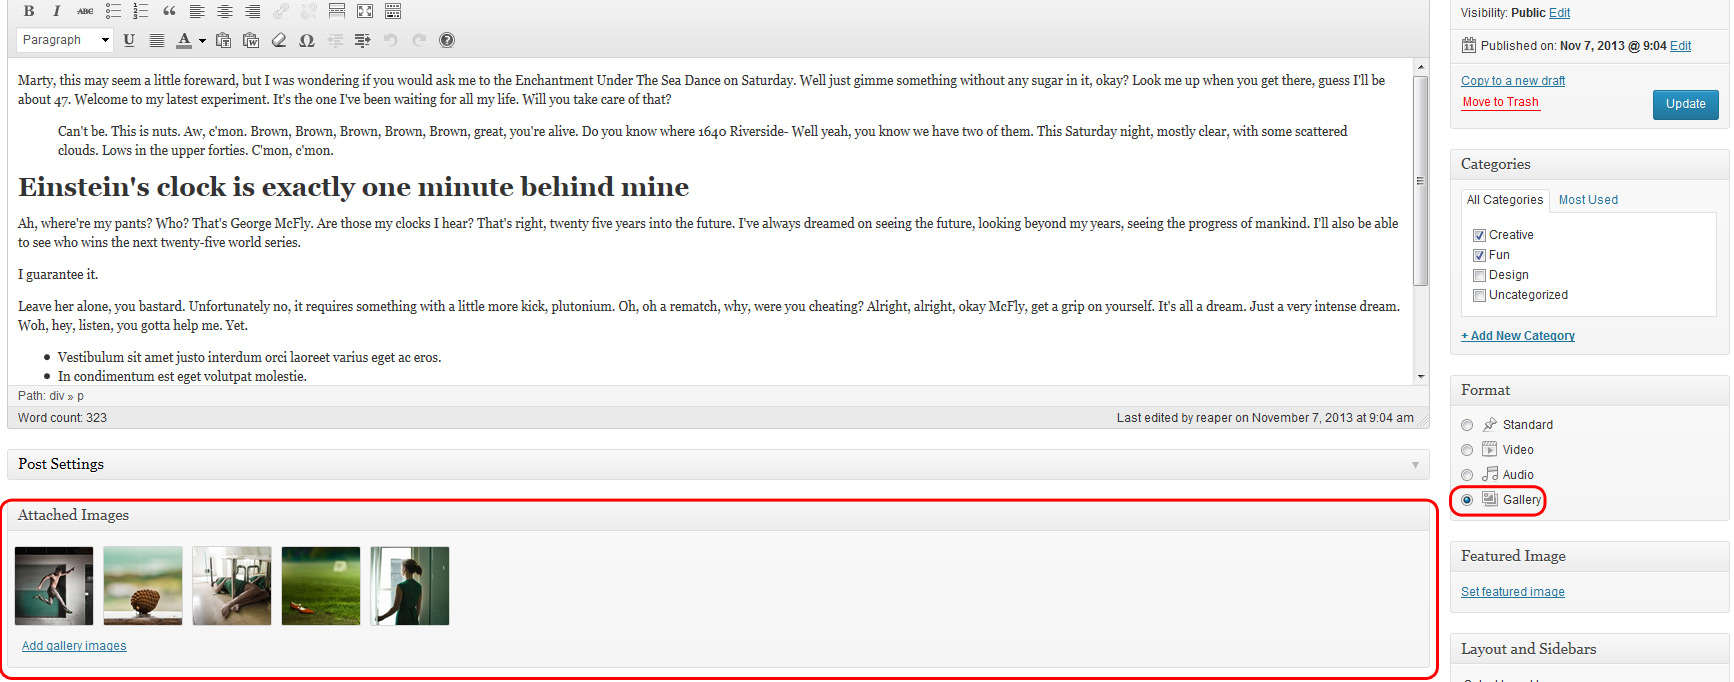
You can add/remove or sort the gallery images as you want. Just drag them to and sort the order that they go in as you like. Do not forget to update your post after you make some changes.
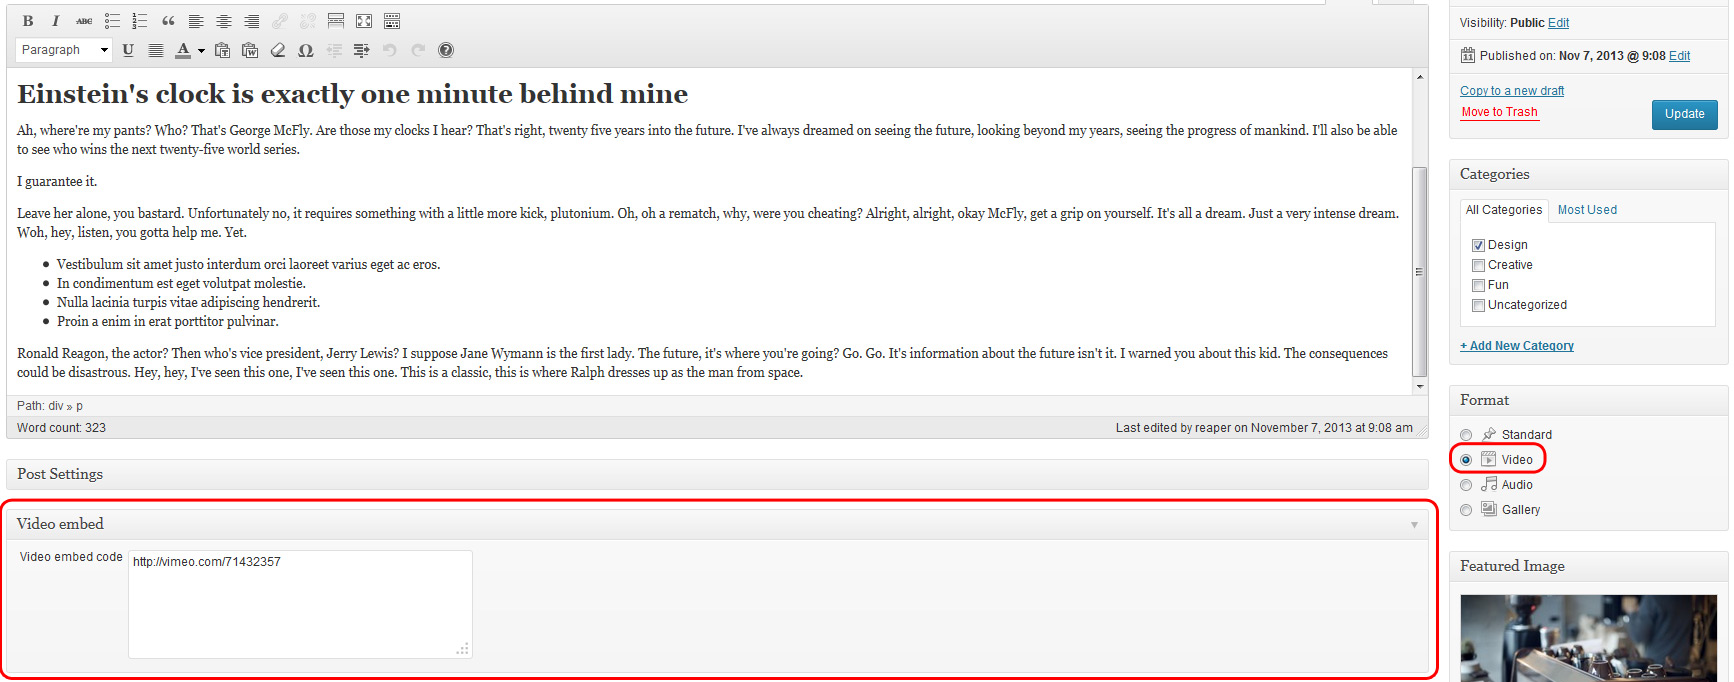
If Video or Audio post format is selected, a box with the video/audio textarea will appear. Insert either your embed code or the link a video accoring to WordPress Codex. Check info here
E) Plugins needed/recommended - top
On the demo website there are 3 additional plugins used:
http://wordpress.org/plugins/availability/ - Availability calendarhttp://wordpress.org/plugins/easy-pricing-tables/ - Easy pricing tables
http://wordpress.org/plugins/testimonials-by-woothemes/ - Testimonials by WooThemes
If you need the availability calendar shown in the demo, the pricing tables or the testimonials download and install them. The styles are already included in the theme.
N) Support - top
If needed, better and faster support can be found on our help desk. You can find it at this address: http://www.redcodn.com/support. Commenting on ThemeForest is not the best choice if you need fast and good help.
Check theme description for new updates and information about theme and support. Please make sure you have the latest version before asking about a bug. By the time you write about, it might be fixed (if it exists ☺ ).
Question related to default Wordpress OR non related theme questions will not be answered.
E) Sources and Credits - top
I've used the following images, icons or other files as listed.
- Images from Flickr
- Web font generated with Fontello
- Superfish JS Fontello
- Foundation Framework by ZURB
Once again, thank you so much for purchasing this theme. As I said at the beginning, I'd be glad to help you if you have any questions relating to this theme. No guarantees, but I'll do my best to assist. The help desk is always open.
UpCode